ADVERTISEMENT
Spread on crackers or toast with honey or jam.
Use in salads, sandwiches, or wraps.
Add to pasta, pizza, or soups for a creamy texture.
Crumble over roasted vegetables or grilled meats.
Cooking Tips
Use fresh whole milk for the best flavor and texture.
Don’t overheat the milk—keeping it just below boiling ensures the best curds.
For a firmer cheese, press the curds under a weight for a few hours.
Save the whey! It’s great for baking, smoothies, or soups.
Nutritional Benefits
High in protein – great for muscle repair and growth.
Rich in calcium – supports strong bones and teeth.
Lower in fat than many store-bought cheeses.
No preservatives – a fresh, homemade alternative.
Dietary Information
Vegetarian
Gluten-Free
Low-carb & Keto-friendly
Nutritional Facts (Per Serving – Approximate)
Calories: 120
Protein: 7g
Carbohydrates: 1g
Fat: 9g
Calcium: 15% DV
Storage
Refrigerator: Store in an airtight container for up to 5 days.
Freezer: Not recommended, as fresh cheese loses texture when frozen.
Why You’ll Love This Recipe
Easy to make with just 3 ingredients!
Healthier and fresher than store-bought cheese.
Customizable with herbs, spices, or different textures.
Versatile – use in sweet or savory dishes.
Conclusion
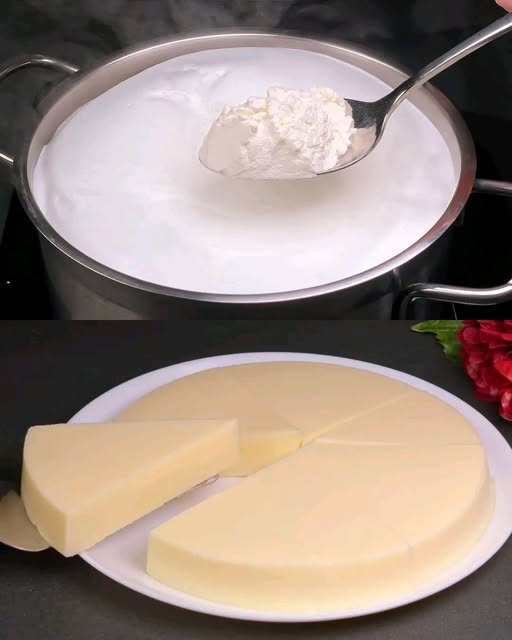
Making fresh cheese at home is easier than you think! This quick and foolproof recipe yields a creamy, delicious cheese perfect for spreading, crumbling, or slicing. No preservatives, no artificial ingredients—just pure homemade goodness. Once you try it, you’ll never go back to store-bought cheese again!This homemade fresh cheese is incredibly easy to make using just three main ingredients: milk, lemon juice (or vinegar), and salt. It’s creamy, mild, and can be used in both savory and sweet dishes. Whether you want a soft, spreadable cheese or a firmer block for slicing, this recipe is perfect for you!
Preparation Time
Prep Time: 5 minutes
Cook Time: 15 minutes
Resting Time: 30 minutes – 2 hours (depending on texture)
Total Time: 45 minutes – 2 hours
Ingredients (Cups and Grams)
4 cups (1 liter) whole milk
2 tablespoons lemon juice (or white vinegar)
½ teaspoon salt
10g (2 tsp) butter (optional, for creaminess)
Herbs or spices (optional, for flavoring: garlic, chives, black pepper, etc.)
Directions
Step 1: Heat the Milk
Pour 1 liter of milk into a large saucepan.
Slowly heat it over medium heat, stirring occasionally to prevent scorching.
Heat until the milk reaches 85°C (185°F), just below boiling.
Step 2: Add Lemon Juice or Vinegar
Once the milk is hot, remove it from the heat.
Stir in 2 tablespoons of lemon juice or vinegar.
The milk will start to curdle, separating into curds (solids) and whey (liquid).
Step 3: Let It Sit
Gently stir for a few seconds.
Cover the pot and let the mixture sit for 10-15 minutes to allow the curds to form completely.
Step 4: Drain the Curds
Line a colander with cheesecloth or a clean kitchen towel.
Pour the curdled milk through it to drain the whey.
Let the curds drain for about 30 minutes for a soft cheese or longer for a firmer texture.
Step 5: Season and Mix
Transfer the drained curds to a bowl.
Stir in ½ teaspoon salt and 10g butter (optional) for extra creaminess.
Mix in herbs or spices if desired (e.g., chopped chives, garlic powder, black pepper).
Step 6: Shape and Chill
For soft cheese: Store the cheese in an airtight container.
For firm cheese: Wrap the curds in cheesecloth and gently squeeze out any excess whey.
Shape it into a ball or log, cover with cling film, and refrigerate for 2-3 hours until set.
Serving Suggestions
ADVERTISEMENT
